


A Golf Enthusiast's Paradise Play Legendary Golf
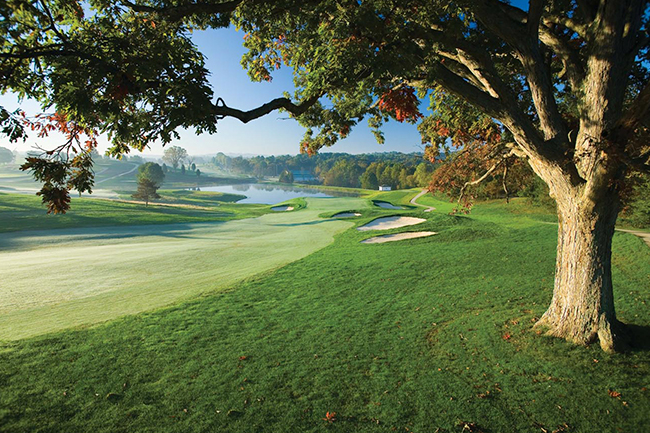
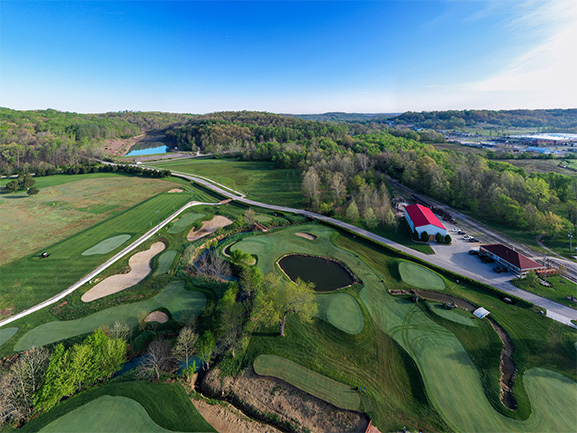
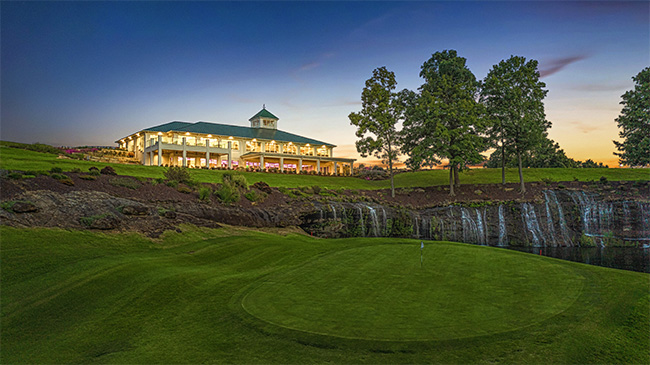
Few things get the blood pumping like the mention of Donald Ross, Pete Dye and Tom Bendelow in the same sentence. Nowhere else in the world can a golfer play courses designed by each of these noted and prolific designers at one resort destination. The rolling hills of southern Indiana provide a beautiful yet challenging experience with 54 holes of legendary golf.


- No. 1 Course in Indiana, Golfweek’s Best You Can Play, 2010 - 2025 (The Pete Dye Course)
- No. 2 Course in Indiana, Golfweek’s Best You Can Play, 2011 - 2025 (The Donald Ross Course)
- No. 51, America's 75 Best Golf Resorts, Golf Digest, 2025
- No. 4 (The Pete Dye Course) and No. 12 (The Donald Ross Course), Top Casino Golf Courses, Golfweek, 2025
- No. 18, America's 100 Greatest Public Courses, Golf Digest, 2025 (The Pete Dye Course)
- No. 19, America's 100 Greatest Public Courses, Golf Digest, 2024 (The Pete Dye Course)
- No. 4 Top 10 Donald Ross Courses You Can Play, LINKS Magazine, 2022
- National Course of the Year Winner, National Golf Course Owners Association, 2017 (The Pete Dye Course)
- No. 17, America’s 100 Greatest Public Courses, Golf Digest, 2014 - 2015 (The Pete Dye Course)
- No. 83, America’s 100 Greatest Public Courses, Golf Digest, 2015 (The Donald Ross Course)
- No. 4, Best Casino Courses, Golfweek, 2015 - 2017 (The Pete Dye Course)
- No. 14, Best Casino Courses, Golfweek, 2015 (The Donald Ross Course)
- No. 60, The 75 Best Golf Resorts, Golf Digest, 2014
- No. 2 Casino Course in the U.S., Links Magazine, 2014 (The Pete Dye Course at French Lick)
- No. 27, Top 100 Best Resort Courses, Golfweek, 2014 (The Pete Dye Course)
- No. 48, Top 100 Best Resort Courses, Golfweek, 2014 (The Donald Ross Course)
- No. 93, America’s 100 Greatest Courses, Golf Digest, February 2013 (The Pete Dye Course)
- No. 17, America’s 100 Greatest Public Courses, Golf Digest, February 2013 (The Pete Dye Course)
- No. 100 America’s 100 Greatest Public Courses, Golf Digest, February 2013 (The Donald Ross Course)
- Top 50 Ranges in the U.S., GolfRange.org, 2012, 2013 (The Valley Links Course)
- Indiana Golf Course of the Year, NGCOA, 2012 (The Pete Dye Course)
- Top 3 Finalist, NGCOA, 2012 (The Pete Dye Course)
- Indiana Course of the Year, Indiana Golf Course Owners Association, 2012 (The Pete Dye Course)
- No. 2 among the Top 10 Northern U.S. Golf Resorts, Condé Nast Traveler, 2011 & 2012 (West Baden Springs Hotel)
- Top 100 Best Public Courses, Golf Digest, 2010 & 2011 (The Pete Dye Course & The Donald Ross Course)
- No. 5 Best Casino Course, Golfweek, 2010 (The Pete Dye Course)
- Best Public Course in Indiana, GOLF Magazine, 2010, 2012, 2014 (The Pete Dye Course)
- America’s Best New Public Course, Golf Digest, 2009 (The Pete Dye Course)
- Best New Course of the Year, Golf Magazine, 2009 (The Pete Dye Course)
- Rated One of The Best New Courses, Links Magazine, 2009 (The Pete Dye Course)
- America’s Top 30 Casino Courses, Golfweek, 2008 (The Donald Ross Course)
- 18 Best Holes in Indiana, Indiana Business Magazine, 2008 (The Donald Ross Course)
- Excellent Rating, Zagat Survey Guide to America’s Top Golf Courses, 2007, 2008
- Runner Up: Best Remodel in America, Golf Digest Magazine, 2007 (The Donald Ross Course)
- Runner Up: 2007 Renovation of the Year, GOLF Magazine, 2007 (The Donald Ross Course)
- Host Site: The Korn Ferry Tour Championship presented by United Leasing & Finance, 2024 & 2025
- Host Site: Senior PGA Championship presented by KitchenAid, 2015
- Host Site: Senior LPGA Championship, 2017, 2018, 2019, 2021
- Host Site: LPGA Legends Tour Championship, 2013, 2014, 2015, 2016
- Host Site: Big Ten Men’s Golf Championships, 2012, 2013, 2014, 2022
- Host Site: Big Ten Women’s Golf Championships, 2014
- Host Site: USGA Men’s State Team Championship, 2014
- Host Site: Indiana Open, 2012, 2016, 2024
- Host Site: PGA Professional National Championship, 2010
Golf FAQs
Overnight guests of French Lick Resort have priority access to the Pete Dye, Donald Ross and Valley Links courses. If you are not a hotel guest and want to make a tee time, call (844) 489-0529 for rates and availability.
French Lick Resort’s complimentary resort shuttles run 24 hours a day, 7 days a week for convenience traveling between the golf courses, hotels, restaurants, casino and other resort amenities.
Please be aware that shuttle service is not provided outside of French Lick. If you plan to play Sultan’s Run Golf Club in Jasper, transportation will be on your own.
Men are required to wear golf shirts with a collar and golf shorts or slacks (no sleeveless shirts or gym shorts). For ladies, no swimwear or crop tops.
The Pete Dye Course requires a forecaddie with each group (rate of $50 per person, per round plus gratuity).
Caddies may be available at The Donald Ross Course upon request.
Yes, you can ship your clubs to:
French Lick Resort 8670 W. State Road 56 Frech Lick, IN 47432
Please include the first course you plan to play: Pete Dye, Donald Ross or Valley Links.
Should you decide not to play because of inclement weather conditions, please visit the golf shop to discuss your options.
Personal coolers or outside alcoholic beverages are not permitted on any of the courses.
French Lick Resort is a licensed premise, and it is against Indiana law to bring alcoholic beverages onto licensed premises.
Premium rental clubs are available at all courses for $75 per day, including balls and tees.
The Pete Dye Course has a driving range that can be used during day of play only.
There is not a driving range at The Donald Ross Course. There is a 4-bay warmup net on site at the Ross Course, and golfers also have access to the driving range located at The Valley Links Course.
FootGolf is no longer available at French Lick Resort. However, our new Sand Creek Course at French Lick Resort is a terrific family-friendly option that all ages can enjoy. All nine holes are 90 yards or less, and children 18 and younger receive a special youth rate.
No results found.
Keep Up With Us
Get everything you want to know about French Lick Resort delivered right to your inbox. Set your preferences and receive only the communications that interest you.